
Navigating the Portal
Layout
The portal has a fixed left-hand sidebar and a main content area. The current organisation is shown in the top bar alongside the sign-out button.
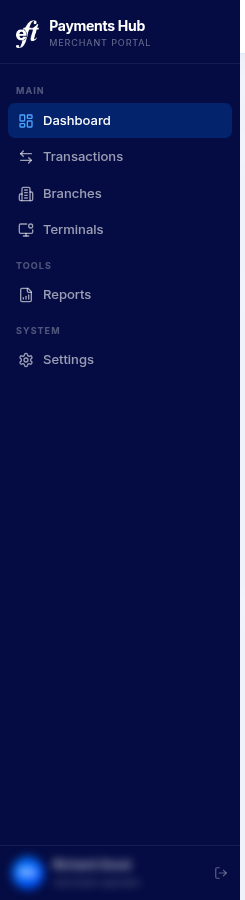
The sidebar is divided into three groups:
- Main — Dashboard, Transactions, Branches, Terminals (RAP operators also see Merchants here)
- Tools — Reports, and Team (visible to Admins only)
- System — Settings
Dashboard
The dashboard is your home screen and updates in real time.
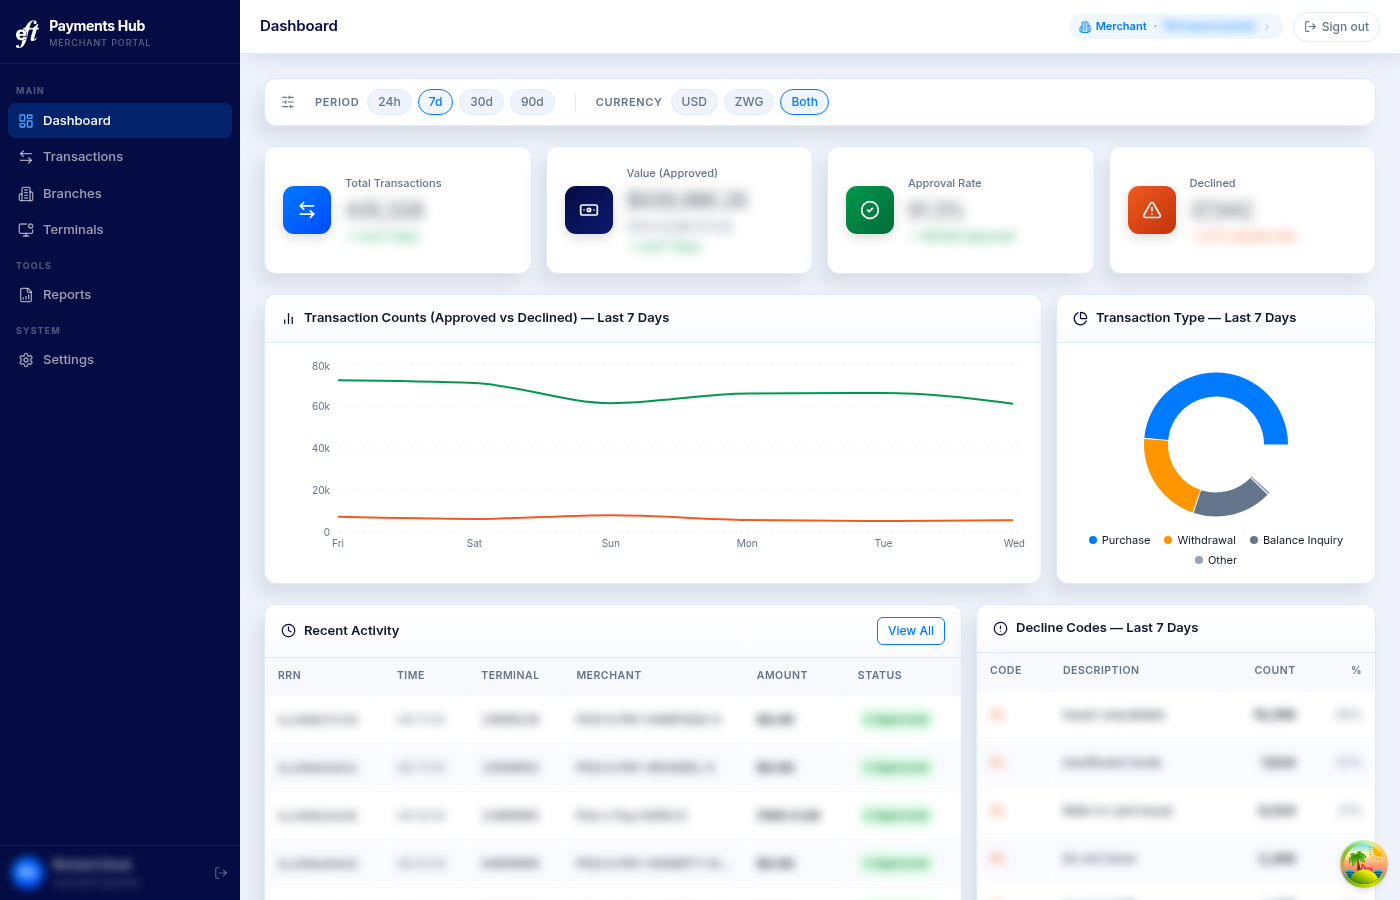
Use the period selector (24h / 7d / 30d / 90d) and currency filter (USD / ZWG / Both) at the top to control what all widgets display.
| Stat card | What it shows |
|---|---|
| Total Transactions | Count of all processed transactions in the period |
| Value (Approved) | Sum of approved transaction amounts |
| Approval Rate | Percentage of transactions approved |
| Declined | Count and decline rate |
Below the stat cards: a volume trend chart, a transaction-type breakdown, a recent activity feed, and a decline-code breakdown showing the most common reasons for declines.
Merchants
NoteThe Merchants section is visible to RAP operators only. Merchant users see their own organisation's analytics directly on the Dashboard.
The Merchants page lists all merchant organisations linked to your RAP account. Click any merchant to open its detail page.
Performance View
The page header has two toggle buttons — List and Performance. Switching to Performance replaces the merchant list with a ranked comparison of all your linked merchants.
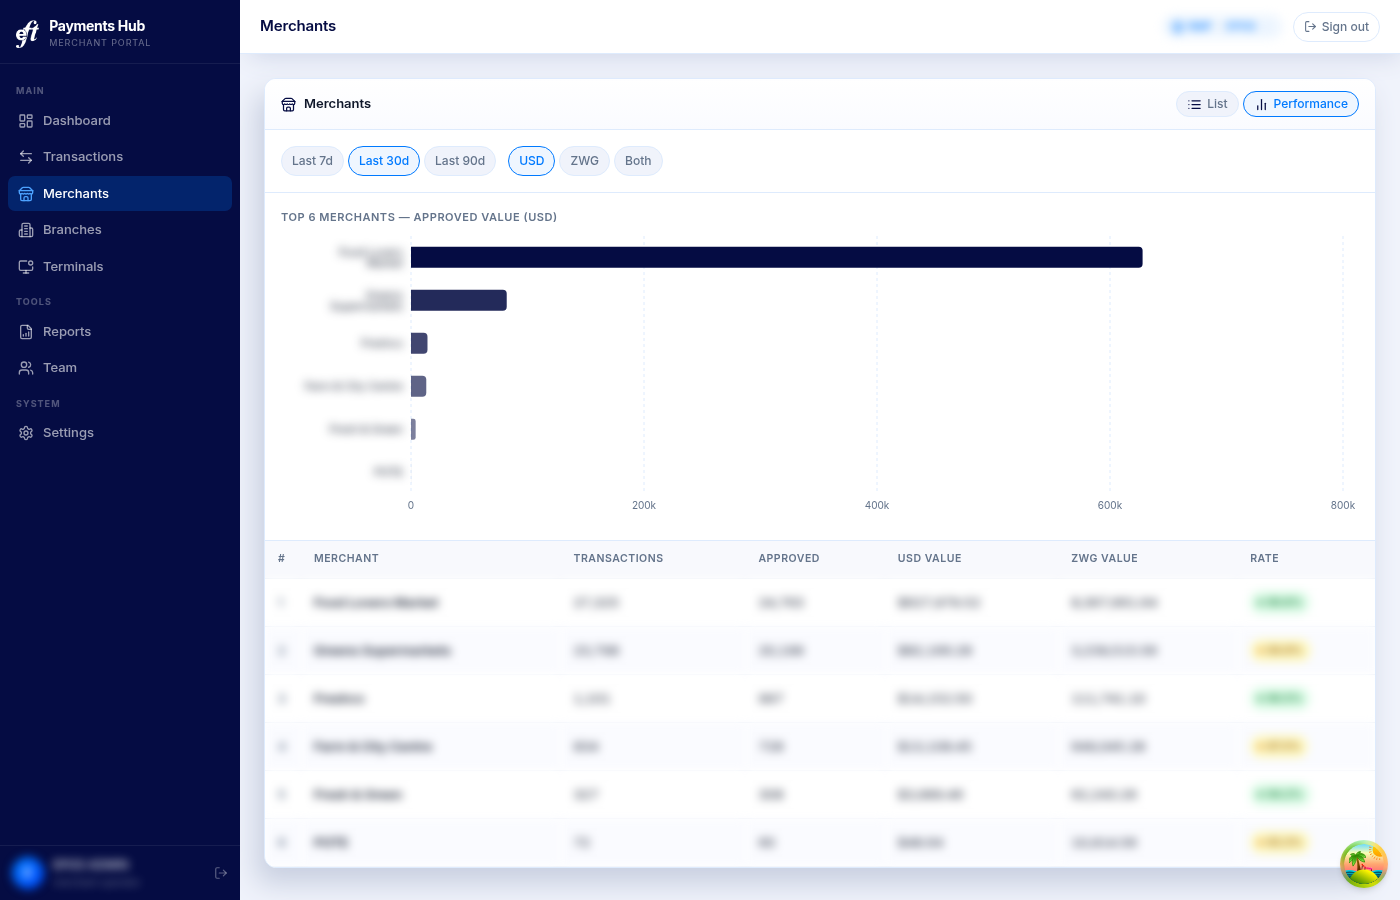
Use the filter chips to set the period (Last 7d / Last 30d / Last 90d) and currency (USD / ZWG / Both).
The view shows two things:
- Horizontal bar chart — top 10 merchants ranked by approved value for the selected currency. Each bar represents one merchant; the longest bar is your highest performer. Click any bar to go straight to that merchant's detail page.
- Ranking table — all merchants with columns for rank, total transactions, approved count, USD approved value, ZWG approved value, and approval rate. Click any row to open that merchant.
| Column | Description |
|---|---|
| # | Rank by approved value for the selected currency |
| Merchant | Merchant name |
| Transactions | Total transaction count |
| Approved | Count of approved transactions |
| USD Value | Approved value in USD |
| ZWG Value | Approved value in ZWG |
| Rate | Approval rate — green ≥90%, amber ≥70%, red <70% |
Branches
The Branches page lists all your physical locations. Search or scroll to find a branch, then click it to see its terminals and transaction detail.
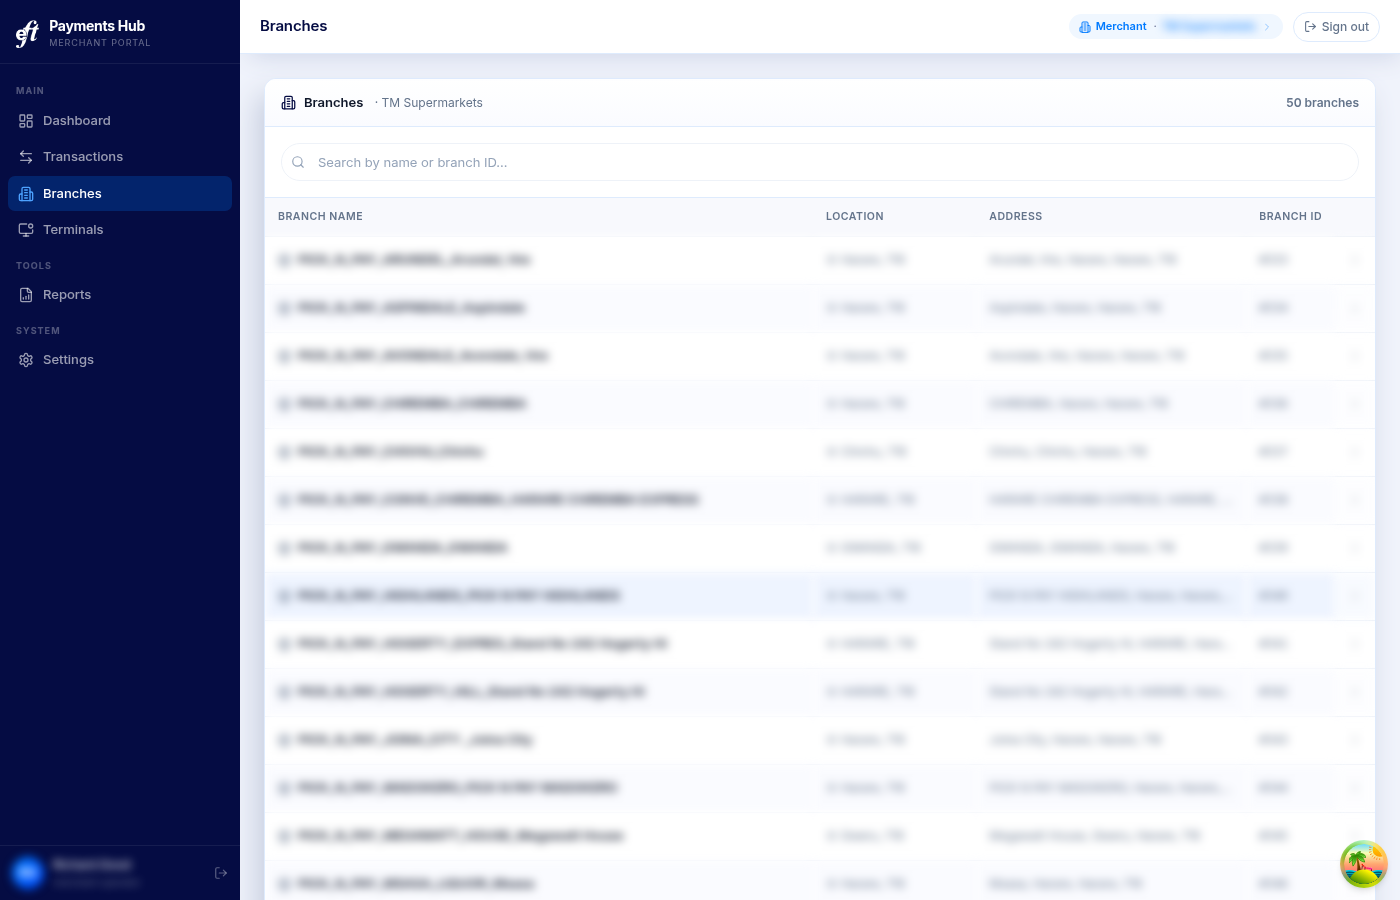
Performance View
The same List / Performance toggle available on the Merchants page is also present on the Branches page. Switching to Performance shows a ranked comparison of all branches within the selected merchant.
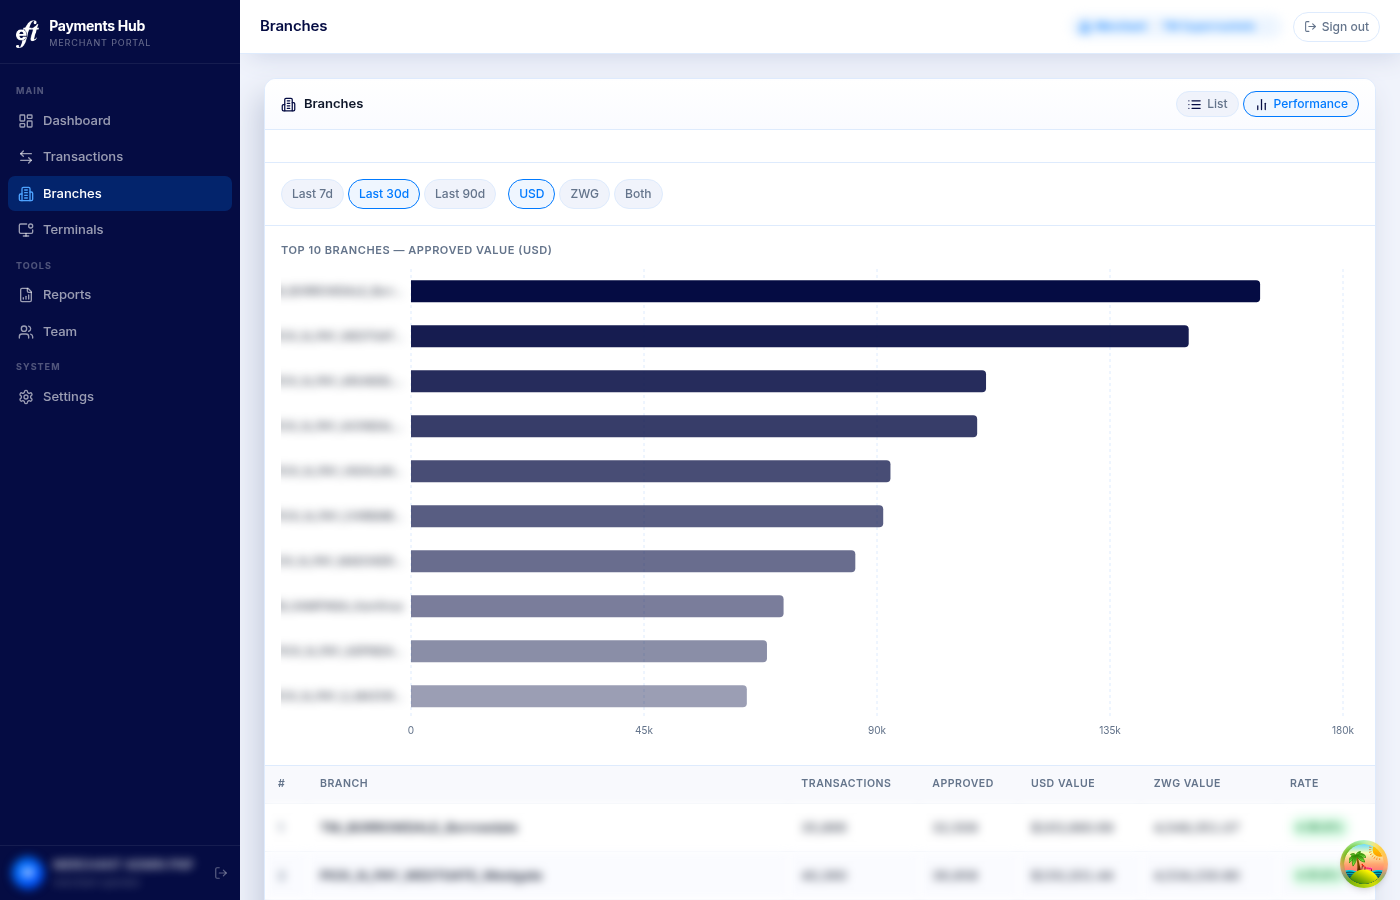
The layout is identical to the merchant performance view: period and currency filter chips, a horizontal bar chart of the top 10 branches by approved value, and a ranking table. Click any bar or table row to open that branch's detail page.
Reports
Reports let you run summarised queries across your transaction data and either view them on screen or have them delivered by email.
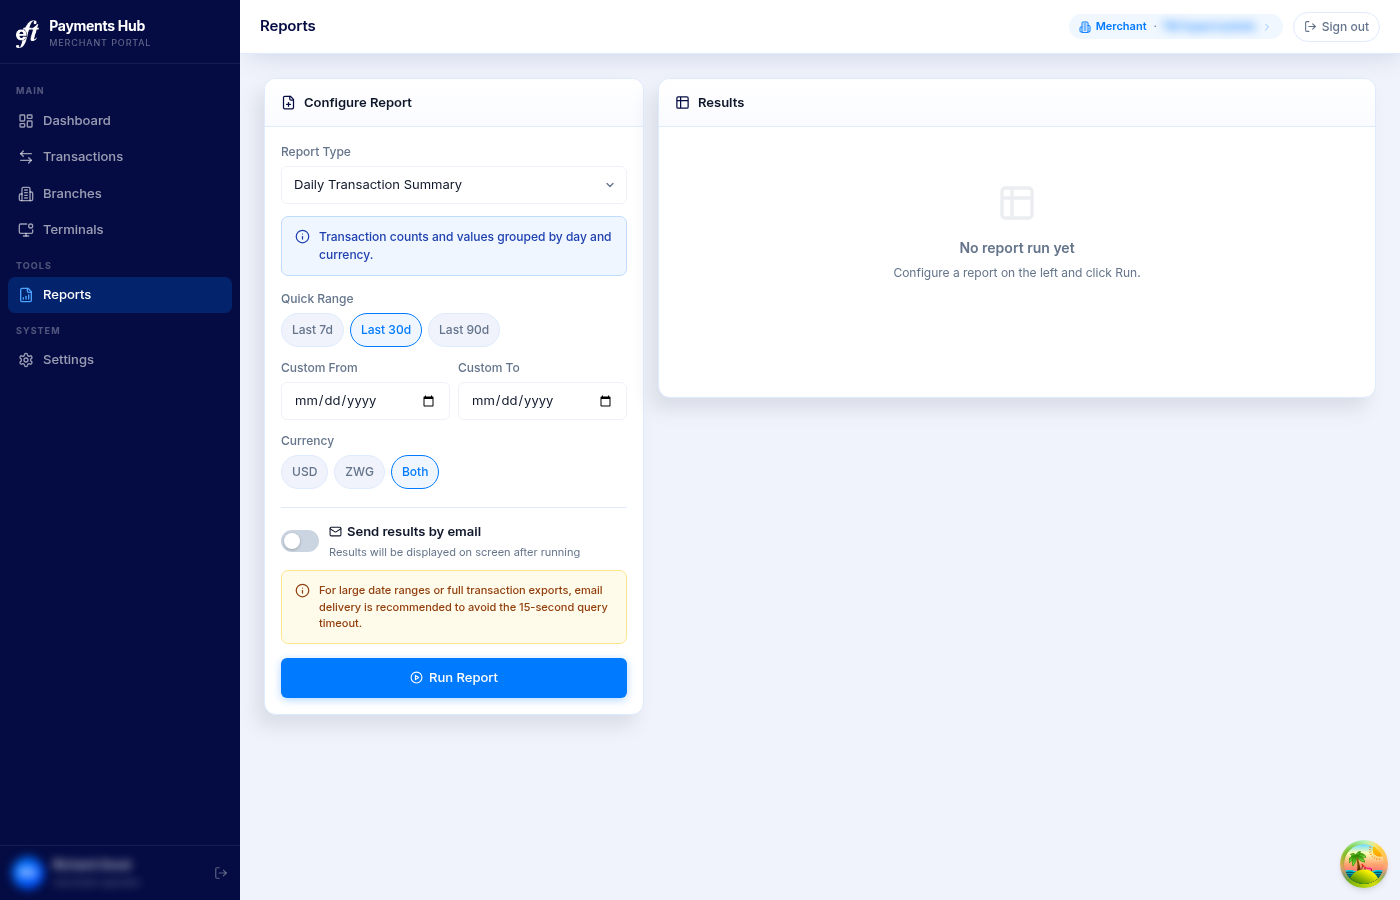
Select a Report Type, pick a date range using the quick selectors or custom date fields, choose a currency, then click Run Report.
For large date ranges or full transaction exports, toggle Send results by email — on-screen queries time out after 15 seconds, but email delivery handles larger datasets.
Transactions
The Transactions page shows your full transaction history with filtering by date, status, terminal, and amount. Click any row to see the full transaction detail.
NoteTransaction data is read-only. You cannot void or refund transactions from this portal.
Settings
Under Settings you can update your name and email address, change your password, and manage two-factor authentication.
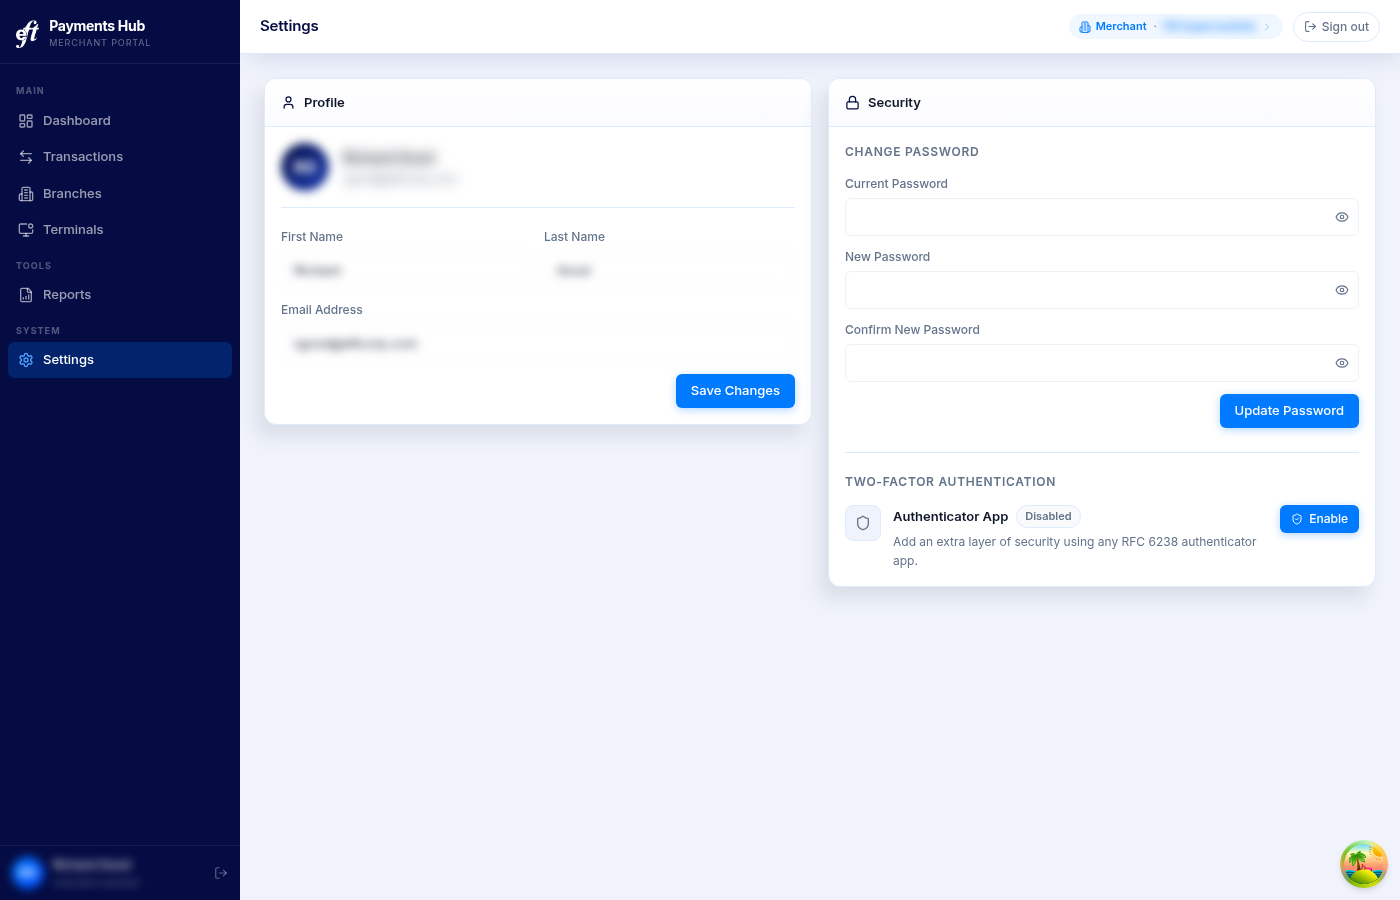
Changing your password
Fill in your current password and your new password, then click Update Password. The strength checklist shows in real time whether your new password meets all requirements.
Enabling 2FA
- Go to Settings → Security → Two-Factor Authentication.
- Click Enable.
- Enter your current password and click Continue.
- Scan the QR code with your authenticator app (Google Authenticator, Microsoft Authenticator, or any RFC 6238-compatible app).
- 2FA is now active — you'll be prompted for a code on every sign-in.
RecommendationEnable 2FA on all Admin accounts. It protects your team management capabilities from unauthorised access.